*FYI - this post may contain affiliate links, which means we earn a commission at no extra cost to you if you purchase from them. Also, as an Amazon Associate I earn from qualifying purchases. Check out our Privacy Policy and Disclosure. for more info.
Is your pierogi dough too sticky? Wondering why your pierogi dough is tough, or shrinking? Read on for a full guide to pierogi dough and how to troubleshoot common mistakes.
I adore making and eating perogies, but if there’s one dough I consider my “Everest” in the dumpling world, it’s perogy dough (or pierogi dough, if you want to spell it the Polish way).
Listen: I’ve never been good at dough in general but perogy dough finds a way to completely throw me ecvery time.
I’ll follow recipes like an obedient schoolgirl but somehow I always, ALWAYS end up with a wet elasticky mess that won’t roll out, shrinks like it’s terrified upon contact and (while tasty) takes the better part of my day to turn into actual perogies.
So, kneadless to say (ha), it’s pretty important that you know the basics of perogy dough before you embark on the wild adventure of making some for yourself.
In this article, I’ll review everything you need to know about perogy dough, including ingredients, technique, recipes I’ve tested and of course tips on nailing it. Think of this guide as your pero-key to success!
Now, enough with the pierogi puns. Let’s go!
Ingredients of Perogy Dough
There is a LOT of conflicting information out there about the essential ingredients of perogy dough, but in every perogy dough recipe, you will find some combination of flour, salt, and wet ingredients like water, milk, sour cream, or eggs.
The exact proportions (and inclusions/exclusions) are what differ in every pierogi dough recipe.
Of course, each of these ingredients serves a purpose and adds a certain quality to the dough.
This is why your ideal perogy dough will differ from mine, will differ from your neighbours, will differ from your neighbour’s dog… you get the point.
And also why nobody (from Polish grandmas to professional chefs) can agree on what the exact best perogy dough recipe is.
Honestly, besides plenty of (delicious) trial and error, there’s no way to figure out your ideal perogy dough recipe.
That said, it helps to know what each ingredient does for the dough, so here is a brief overview of every castmember’s role in the grand production of pierogi dough:
- Eggs: Adds more structure to the dough, makes it stiffer and gives it more bite
- Sour cream: Adds a nice subtle sour cream flavour and a richness/springiness to the dough
- Milk: Adds richness and tenderness to the dough (with less calories and flavour than sour cream). Caution: adding milk might make your dough sticky so be sure to adjust flour accordingly
- Hot water: Said to make the dough more pliable and easier to work with. Caution: adding dough that is TOO hot might result in a sticky and gummy dough
- Butter: Adds a nice buttery flavour and richness to the dough
Overall, any combination of these ingredients that yields a pliable, rollable dough will work in perogi-land. It’s all a matter of taste!
Perogy Dough Technique
Honestly? I’ve found that no matter how much you fiddle around with the recipe, perogies pretty much always taste great so long as your filling and toppings are on point.
This is comforting, because perogy dough is pretty hard to nail. It’s pretty forgiving though, so don’t stress too much.
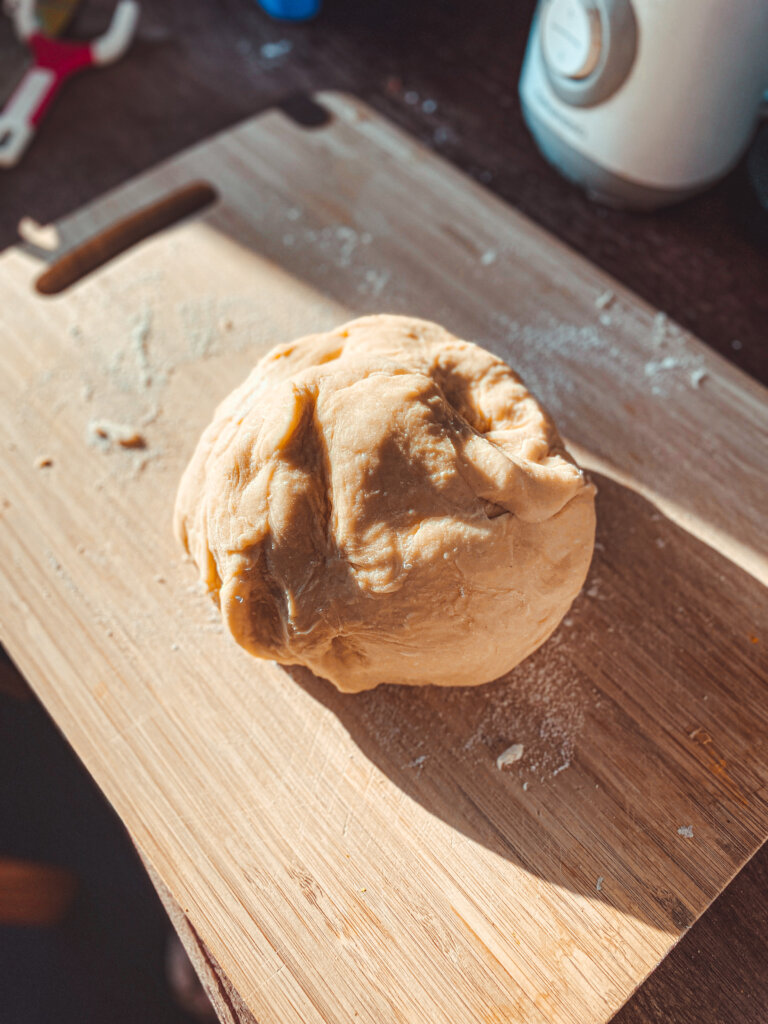
Overall, the technique for perogy dough is simple: start with your dry ingredients (flour mostly) and slowly incorporate all your wet ingredients to form a soft dough. Knead away until it forms a soft, elastic, lump. Dough too soft? Add flour gradually. Dough too dry? Add (tiny amounts of water) gradually.
The thing about perogy dough recipes is there’s always wildcards, especially if you add eggs.
That’s why a dough with eggs will always need some flexibility because eggs come in different shapes and sizes, so it’s highly unlikely your dough will be perfect with the exact amount of flour the recipe calls for.
What you should be looking for instead of just following a recipe step by step is the perfect dough texture. It shouldn’t be sticky, it should be able to roll out, and form a nice ball.
Don’t worry though, as someone who has yet to master the art of kneading the perfect perogy dough, I know it’s seldom as easy as it looks in recipe videos. Still, this dough is so forgiving that so long as you can get your fillings in there to cook, you’re good.
Pierogi Dough Recipes I’ve Tried
I’m still on the hunt for THE perfect perogy dough recipe, but overall, I usually pick ones that involve sour cream because I love what that flavour does for the dough.
Here is the one I followed last. It was a bit tough to work with because I only had a super thick sour cream (Schmand) which messed up my proportions a little and I very possibly overkneaded it, but overall it tasted awesome.
I’ve also used this one with some success, although the dough was a bit soft for my liking and didn’t hold up as well to the boiling process as the first one I mentioned.
Final Perogy Dough Tips & Mistakes to Avoid
Last but not least, let’s run through some tips and mistakes to avoid (collected from traumatic personal experience) to help you troubleshoot your dough and make sure it rocks your socks off.
- Don’t overknead: Be careful to not overknead the dough, which I think is my usual problem. You need to give it some time to relax so you can roll it out more easily without it being an elastic mess.
- Make any adjustments gradually: If your dough is too sticky, flour is usually the answer, and if your dough is too dry, water is usually the answer. When adding these adjustments to your dough, BE CAREFUL! Adding them slowly a bit at a time is crucial to ensuring you don’t overdo it and royally mess up your dough.
- Let it rest: If you find that your perogy dough is really sticky, yes oftentimes this means more flour is needed, but other times all you need is a 15-20 minute break for the dough to rest and firm up.
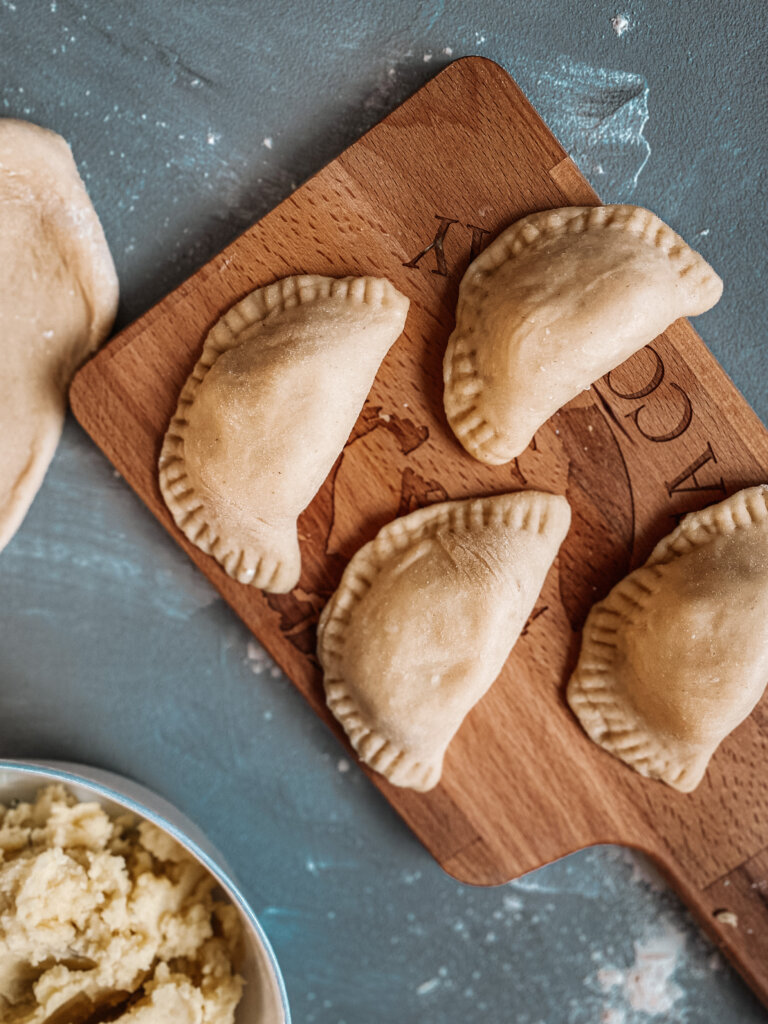
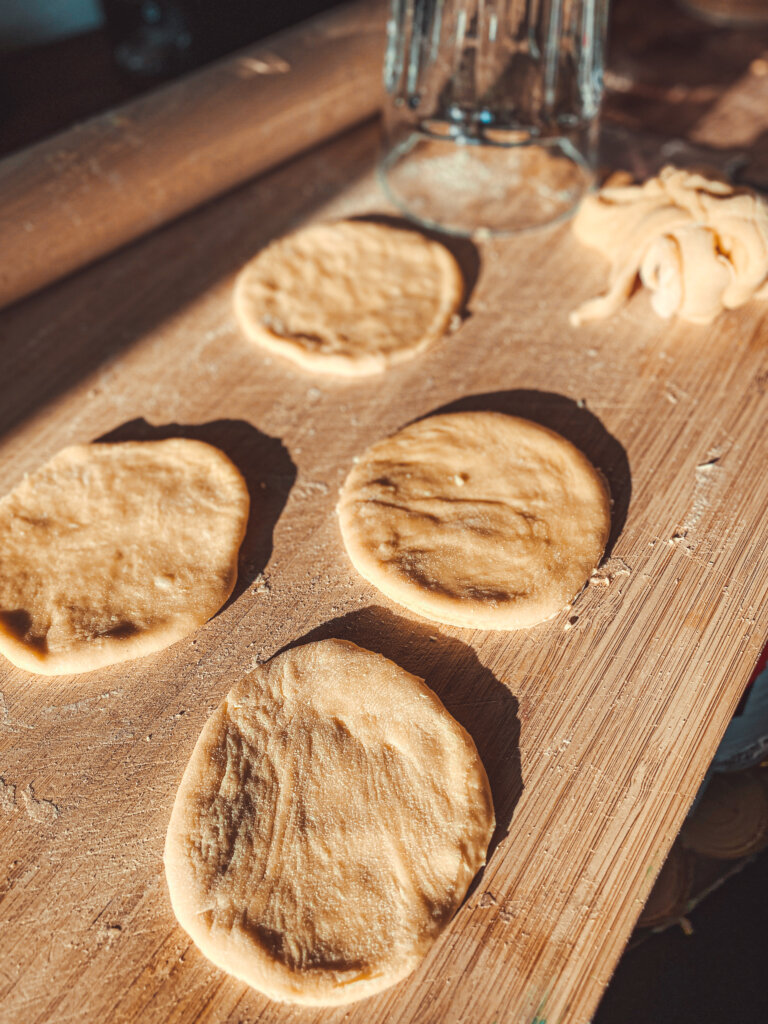
- Make sure your dough is thin enough before adding filling: Nothing spoils a perogy like a really off dough-to-filling ratio. If you’re not careful, you can easily roll the dough unevenly and create super thick pockets of dough, so make sure your dough is pretty uniform before adding filling. After cutting disks, you can easily flatten them out with your fingers to ensure there’s no overly thick parts.
Pierogi Dough FAQ
What do I do if my pierogi dough is too sticky?
You should be able to handle your pierogi dough without it sticking to your hands. It should also be able to knead out easily.
If you find that your pierogi dough is too sticky (i.e. it’s clinging to your hands or to the rolling pin), more flour is the answer. Add tiny bits of flour into your dough until it’s no longer sticking to everything it touches.
Why does my pierogi dough shrink?
The first few times I attempted perogies, I found that the dough would always shrink after I cut it out into disks. This problem was manageable and didn’t impact taste, but was nonetheless pretty annoying.
What I eventually learned was pierogi dough tends to shrink when you overwork the dough. When pioergi dough is too elastic, then it shrinks back when you knead it, and even after you cut it out into disks.
Luckily, it’s an easy fix – just let the dough rest for a while! 30 minutes or more is ideal – but after you let the dough relax for a bit, it should be less elastic/shrinky.
Why is my pierogi dough tough?
If your pierogi dough is too tough, then odds are you need some more liquid in there to make it more pliable.
Try adding a few drops of water at a time until the dough becomes more pliable and soft to work with.
You can also try to add some drops of milk if you want to make the dough a bit more delicate, but the key is to add only a few drops of liquid in at a time.
Hope you enjoyed this Perogy Dough Crash Course!
Let me know in the comments what your go-to recipe is, and how you like your perogy dough 😉
Thanks For Sharing this amazing recipe. My family loved it. I will be sharing this recipe with my friends. Hope the will like it.
Too many deli pierogies use just flour and water in the dough. You have to make your own.